The goal of this assignment is to produce 4 (5x7) photos
of two different subjects.
(Shooting more and experimenting is always encouraged).
One pair showing changes of motion control (slow shutter/fast
shutter) and the second pair showing changes in Depth of field (large lens opening
and small lens opening).
You will turn in your contact sheet (proper proof) in addition to the four photos.
The contact sheet will contain the images you made of the setup examples in class.
In the Motion Control assignment you learned that you could change the way a moving subject appears in your photo by changing the shutter speed. A fast shutter speed can freeze or minimize movement of the subject while a slow shutter speed exaggerates the movement creating a blur or ghost appearance to your photo.
You also learned that when you change the shutter speed you have to adjust your exposure by changing the lens opening (aperture). Cameras with built-in light meters make this easy by showing you the proper aperture to maintain proper exposure. Remember - every time you change the aperture or shutter speed, you must use your meter to adjust the other control and accomplish proper exposure.
Refer to the class web-site for a graphic
description of how depth of field works.
http://home.earthlink.net/~ppearce/DepthofFieldOverview.htm
In the text see pages 20-21 for motion and depth of field and Pages 38-41 for more on Depth of field.
In this assignment you will use the aperture to alter the degree that your subject
is in apparent focus. You look through your camera with its lens at maximum
aperture, the smallest number of your f stops. This gives you the brightest
view and facilitates focusing because at its widest aperture your lens has the
smallest depth of field. What you see in the viewfinder is what you get. When
you "stop the lens down" or turn it to the smallest aperture, the
depth of field is extended in front of and behind the distance where you focused.
If your camera has a "depth of field preview" feature you will be
able to see this change in the viewfinder. The image will get dimmer but the
degree of sharpness will be apparent. If your camera has a distance and depth
of field scale on your lens, you will be able to calculate the depth of field
to make sure the subject matter you want in focus is included.
If your camera doesn't have a depth of field preview and scale on the lens, you will have to go on faith that the effect will happen. Remember that the DOF extends in front of and behind the area you see in focus. To include two subjects in focus you need to focus between them.
I have included a depth of field
calculator on the site if you want to plug in the numbers and see what should
be in focus.
http://home.earthlink.net/~ppearce/Depth-of-Field%20Calculator.htm
Assignment requirements:
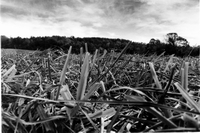
Shoot at least one roll of film experimenting with shallow and deep depth of field. You should try a variety of subjects in varying light and at different distances to see what effect changing the aperture does to the image.
Prints for this assignment must be on 5X7 paper or larger. Subject matter is your choice. Try to use your imagination, shoot something that interests you and try to create a well composed image.
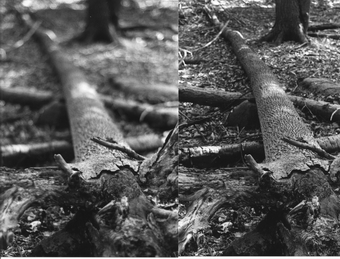
Prints : Just as you did for the motion assignment, you will need to make two photographs of the same subject. One will show deep depth of field and the other shallow. As you learned in the motion assignment, you have to have the right lighting to accomplish this. Shallow depth of field is difficult to get in bright sunlight with 400 speed film. Do not try this part of the assignment in direct sunlight. With a tripod it can be done in fairly low light.
These two exposures should be taken from exactly the same position - they should look the same except for the change in depth of field. Be sure to check your light meter to avoid over and under exposure.
If you check your motion photos, you should see this change of depth of field if you correctly changed the aperture to balance your exposure. You need new negatives for this assignment.
You will turn in contact sheets, test strips and examples of work that shows how much effort you put into this assignment. Make sure everything that you turn in is labeled.